How to connect an Android device to Android Studio with WiFi
Hey there! Here is an instruction for you on how to connect you android device to Android Studio over Wifi. Let’s make some preparation first:
#TiredOfCables #StopCableMess #PreventDevicesFromCables #NoCablesRocks #SaveTheChargerPort #FreeUsb
- Take an android device (I’ve got a Galaxy S9 at that time)
- Take a USB-C cable and connect it to your workstation (doesn’t matter if it’s a Mac or a PC)
- Make sure your device is connected to the same WIFI as you workstation is
- Launch Android Studio
It seems like we are ready to go! Let’s start.
Installing a plugin to connect Android device to Android Studio over WiFi
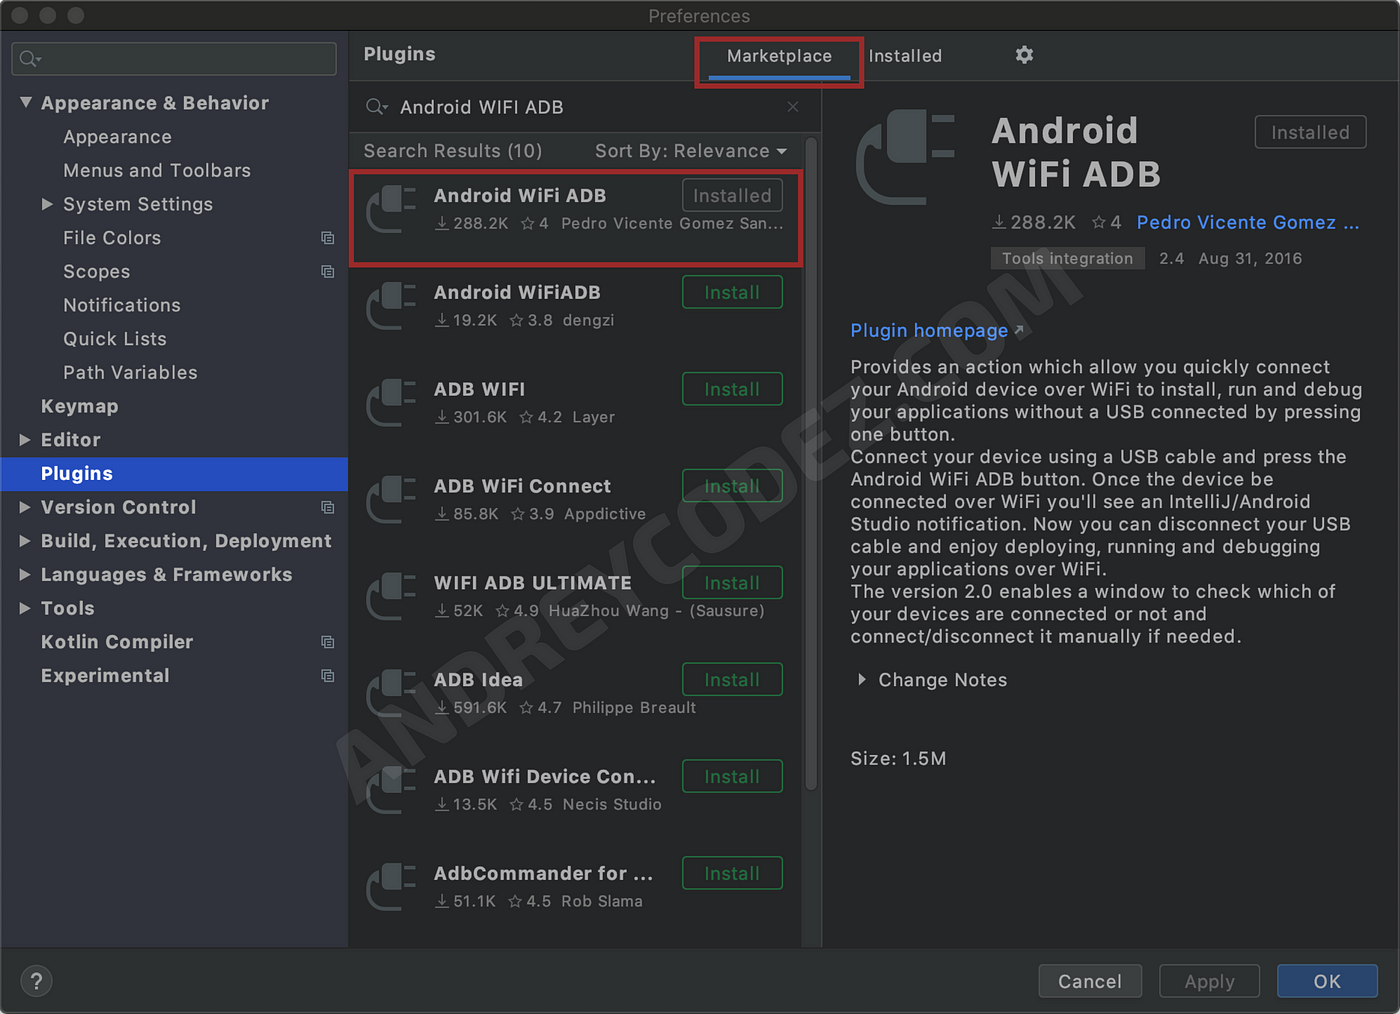
- Go to Android Studio -> Preferences -> Plugins
- Switch to the “Marketplace” search mode
- Type “Android WIFI ADB” in the plugin search field
- Install Android WIFI ADB by Pedro Vicente Gomez Sanches
- Restart Android Studio (just to make sure it restarts and builds okay, but this is optional)
Let’s move forward. After you’ve installed the plugin you will see a greenish-yellow android icon tab with “Android WIFI ADB” text on it on the right pane of Android Studio interface. Click it and plugin’s setting window will appear.
Set up the android device to be connected over WiFi
Here is an important thing — your device has to be cable-connected the first time you are setting it up, but it is just for now, you won’t need it stay connected later.

So, if everything goes fine you’ll see your device in the list of devices with two buttons “Connect” and “Disconnect”. Guess which button you need to click? Haha, a “Connect” one of course!
Click it once… Doesn’t work? Click it one more time. Cays connected? Nope? repeat again… Does it say “connected” now? Yup? Oh, thanks God! Unplug you device from your station and check if it is still on you devices to start the app list.
Well, in my case it worked exactly this way, but the process is not important — the result is. I wish this was an Android Studio out-of-the-box-integrated feature, but it’s not. Xcode — Android Studio 1:0.
Now you can start your App with a green play button on the top panel of Android Studio. Make sure you have selected the device you just connected on the start-the-app list on the left of the green play button.
PS: I’m on my Android developer journey at Devlsopes Android Dev Academy. The original of this article can be found at my blog.
Thanks for reading!